Why High-Quality Home Photos Matter
Home photography tips are essential in today’s real estate market where first impressions happen online, not at the front door. According to research, 98% of home buyers judge whether to visit a property based on listing photos alone.
For quick results, here are the core home photography tips you need:
- Use natural light – Turn off artificial lights and shoot during early morning or late afternoon
- Keep it straight – Use a tripod and align your camera parallel to walls
- Declutter, don’t deep clean – Remove personal items and visual distractions
- Follow the rule of thirds – Position key elements along imaginary grid lines
- Shoot from corners – Capture more of each room from 40 inches height
- Edit carefully – Adjust brightness and contrast without over-processing
The impact of quality photos on your home sale is dramatic:
- Properties with professional-looking photos sell 32% faster
- Homes with high-quality photography receive 47% higher asking price per square foot
- Listings with more than 20 photos spend 32 days less on the market
When we photograph our homes, we’re not just documenting spaces—we’re telling stories. That dated kitchen table isn’t just furniture; it’s where family memories were made. Those living room windows aren’t just glass; they’re where light streams in on Sunday mornings.
As one professional photographer put it: “Interior photography can seem like an art form limited to glossy magazines, but even if your home is far from being featured in Dwell, you can still benefit from having quality photographs for future buyers, renters, or your own enjoyment.”
Whether you’re selling your home or simply preserving memories, these tips will help you capture your space in its best light.

Home photography tips glossary:
– sell condo for cash
– sell my condo
Preparing Your Space for the Shoot
Before you even pick up your camera, preparing your home is the crucial first step toward stunning photos. Real estate listings with professional photos can generate up to 118% more online views, so taking time to prep your space is well worth the effort.

Declutter, Don’t Deep-Clean
Let me share some reassuring news with you – implementing effective home photography tips doesn’t mean scrubbing your house from top to bottom. What really matters is eliminating visual distractions that draw attention away from your home’s best features.
Think of decluttering as temporarily “editing” your space. Gather those scattered remote controls, phone chargers, and mail piles and tuck them into drawers or baskets. In kitchens, clear countertops of appliances you don’t use daily – that toaster and coffee maker can take a brief vacation in a cabinet. Bathroom counters should be free of personal toiletries and cleaning supplies.
“I’m not going to lie,” one photographer friend told me, “clearing clutter is essential, but you don’t need to stress about deep cleaning for your photo session.” Focus on what the camera will see, not what it won’t.
Staging Small & Challenging Spaces
We all have those tricky areas in our homes – the narrow hallway, the oddly shaped bedroom, or the tiny bathroom. With the right home photography tips, these challenging spaces can become photogenic assets.
Mirrors work wonders in small rooms by creating the illusion of more space while bouncing light into dark corners. For rooms with low ceilings, try shooting in portrait orientation to emphasize height. When photographing any room, position yourself in corners to capture three walls instead of just one or two – this simple technique instantly adds depth and dimension.
Bedrooms benefit from simplified, hotel-like bedding – consider temporarily swapping colorful patterns for crisp white linens. If space is tight, you might even temporarily remove doors from their hinges to create a more open feeling (just store them safely against a wall out of frame).
In bathrooms, always close toilet lids and remove personal care items. For kitchens, a simple bowl of fresh fruit or flowers adds a touch of life without creating clutter.
Top 10 Quick Home Photography Tips Checklist
Before you start shooting each room, run through this essential pre-photography checklist:
- Open curtains and blinds fully to flood rooms with natural light
- Turn off ceiling fans to avoid distracting motion blur
- Replace burnt-out bulbs for consistent lighting throughout
- Remove personal photographs to help buyers envision themselves in the space
- Hide everyday items like trash cans, laundry baskets, and pet bowls
- Straighten artwork, pillows, and bed linens for a polished look
- Add fresh flowers to bring life and color to key areas
- Tidy the yard by mowing lawns and removing debris for exterior shots
- Move vehicles from the driveway to capture clear front exterior views
- Create a shot list prioritizing your home’s most attractive features
The goal isn’t perfection – it’s creating inviting spaces that help potential buyers imagine their future life in your home. A well-prepared house not only photographs better but also sells faster and often for a higher price.
Want more comprehensive guidance on selling your home? Check out our ultimate guide to selling your home for additional tips and strategies.
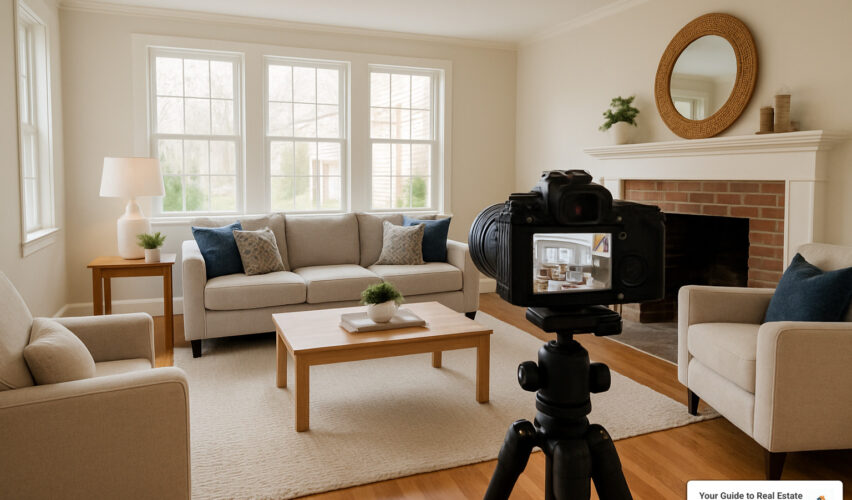
Mastering Light & Composition: Core Home Photography Tips
Light and composition are the foundation of compelling home photography. Mastering these elements can transform ordinary rooms into extraordinary spaces that captivate potential buyers.

Making the Most of Natural Light
Natural light is your secret weapon for stunning interior shots. Think of it as nature’s free photography assistant!
When planning your shoot, timing is everything. Those magical moments about an hour after sunrise or before sunset give you that soft, golden glow photographers chase. I always recommend turning off all artificial lights during your shoot – it might seem counterintuitive, but mixing light sources creates unflattering color casts that are hard to fix later.
Got harsh sunlight streaming through windows? Sheer curtains are your friend. They work like magic to diffuse that intense light while keeping the room bright and airy. For darker corners, try the bounce light trick – simply place a white foam board or even a clean white sheet opposite your windows to reflect light into shadowy areas.
Your home’s orientation matters too. Home photography tips from the pros suggest shooting north-facing rooms between 10 am and 2 pm, east-facing rooms in the afternoon, and west-facing rooms in the morning for optimal results.
“Natural light is often better than any expensive lighting gear,” as one professional photographer puts it. When natural light isn’t enough, resist the urge to use flash! Instead, set up a tripod and use longer exposure times – your photos will have that warm, inviting feel that flash simply can’t deliver.
Composing Shots Like a Pro
Composition is what lifts ordinary room photos to magazine-worthy images. The rule of thirds is your best starting point – imagine dividing your frame into a 3×3 grid and placing key elements along these lines or at their intersections. Most smartphones and cameras have a grid feature you can enable to help with this.
Keep those vertical lines straight! Nothing screams “amateur” like tilted walls. Position your camera parallel to walls to avoid distortion. For that professional magazine look, try shooting from about 40 inches high – slightly lower than eye level – which creates a more flattering perspective.
When possible, capture three walls in your shot by positioning yourself in corners. This simple home photography tips technique immediately adds depth and shows more of the room. Want to highlight your home’s flow? Frame doorways to show how spaces connect – buyers love seeing this natural progression.
Creating depth is essential in flat photographs. Include a bit of furniture in the foreground to establish scale and use architectural features like hallways or countertops as leading lines that draw the eye through the image.
| Composition Approach | Best Used For | Effect |
|---|---|---|
| Rule of Thirds | Most rooms | Dynamic, natural feel |
| Centered Symmetry | Formal spaces, entryways | Elegance, grandeur |
| Leading Lines | Hallways, kitchens | Movement, flow |
| Corner Shots | Small rooms | Spaciousness, context |
As one real estate photographer wisely notes, “Compose your pictures using the rule of thirds – it’s a technique that dates back to 300 BCE and still works beautifully today.”
Common Home Photography Tips Mistakes to Avoid
Even seasoned photographers can stumble into these common pitfalls. Harsh shadows from direct sunlight can ruin an otherwise perfect shot, creating distracting contrast. Similarly, mixing natural and artificial light creates that yellowish cast that makes rooms look dated and unappealing.
While wide-angle lenses are popular for interior photography, going too wide creates that funhouse mirror effect where rooms look unnaturally stretched. Always check that your camera is level – crooked horizons are an instant giveaway of amateur photography.
Watch out for reflective surfaces! Direct flash creates unflattering hotspots on windows, mirrors, and glossy surfaces. And speaking of reflections, always check mirrors and windows for your own reflection before shooting. As one photographer humorously puts it, “Unless you’re in the witness protection program, avoid capturing yourself in reflective surfaces.”
The right equipment makes a difference too. Consider a Canon 50 mm low-light lens for challenging lighting conditions – it’s a favorite among real estate photographers for its ability to capture crisp images in less-than-ideal light.
Mastering light and composition isn’t about having the most expensive gear – it’s about understanding how to work with what you have. With these home photography tips, you’re well on your way to creating images that will make potential buyers fall in love with your home before they even step through the door.
Essential Gear & Ideal Camera Settings
While skill trumps equipment, having the right tools can significantly improve your home photography results. You don’t need professional-grade gear to achieve excellent photos, but understanding what equipment works best will help you make informed choices.

Budget vs Pro Gear Choices
The good news is that quality home photography tips work regardless of your budget. You don’t need to break the bank to capture stunning images of your home.
If you’re working with a smartphone, you’re already halfway there. Most recent iPhones (12+ series) or equivalent Android devices can capture impressive photos. Add a clip-on wide-angle lens for about $15-$100 to expand your field of view, perfect for making rooms appear more spacious. A smartphone tripod ($20-$50) will eliminate camera shake, and a basic remote trigger ($15-$30) lets you snap photos without touching your phone.
For those ready to step up their game, an entry-level setup might include a basic DSLR or mirrorless camera like the Canon Rebel series, Nikon D3500, or Sony a6000. Pair it with the standard 18-55mm kit lens and add a 50mm f/1.8 prime lens for detail shots and better low-light performance. A sturdy tripod with a bubble level is essential, and don’t forget a remote trigger to prevent camera shake.
As one photographer told me, “It’s not the camera but the person using it that makes great photos. Even an iPhone can produce pro-quality listing images if you master timing and composition.”
For serious enthusiasts, a full-frame camera like the Nikon D850 or Sony Alpha A7 III offers superior image quality, especially in challenging lighting conditions. A wide-angle lens in the 16-24mm range is perfect for interiors, while a Canon 50 mm low-light lens provides excellent detail shots. Add a professional tripod with a ball head, external flash with diffuser, and advanced editing software to complete your kit.
Real-Estate Settings Walk-Through
Understanding your camera’s settings is where many beginners get overwhelmed, but mastering a few basics will dramatically improve your results.
Start with ISO—think of this as your camera’s sensitivity to light. For crisp, clean images, keep it as low as possible. In well-lit rooms, aim for ISO 100-400. When shooting darker spaces without a tripod, you might need to increase to 800, but be aware that higher ISOs introduce digital noise (graininess) to your photos.
Aperture (f-stop) controls both light intake and depth of field. For maximum sharpness across the entire room, use f/8 to f/11. When shooting details like kitchen fixtures or architectural features, you might open up to f/2.8 to f/4 for a pleasing background blur that draws attention to your subject.
“Shoot in manual mode,” a professional photographer once advised me. “It might seem intimidating at first, but it gives you full creative control over your images.” If manual mode feels overwhelming, start with Aperture Priority mode (A or Av on your camera dial), set your aperture to f/8, and let the camera determine the appropriate shutter speed.
Shutter speed matters tremendously for sharp images. When shooting handheld, don’t go slower than 1/60 second to avoid camera shake. With a tripod, you can use longer exposures (1/15 or slower) to capture more light in dim rooms. For bright exterior shots, 1/100 or faster will freeze any movement.
White balance is your secret weapon for natural-looking colors. In rooms with consistent natural light, the Daylight or Auto White Balance setting usually works well. For spaces with mixed lighting (windows plus lamps), consider using a custom white balance with a gray card for the most accurate results.
Finally, if your camera offers RAW format, use it! RAW files contain all the image data your camera captures, giving you much more flexibility when editing. If RAW isn’t available, use the highest quality JPEG setting.
For consistent indoor lighting, consider investing in softbox studio lights that provide soft, diffused illumination without harsh shadows or color casts—perfect for those darker rooms where natural light is limited.
The exposure triangle (ISO, aperture, and shutter speed) works together to create properly exposed images. Adjusting one setting affects the others, so experiment to find the perfect balance for each unique space in your home.
Post-Production & Advanced Improvements
Even the best photographers rely on post-production to lift their images. Editing isn’t about creating fake representations but enhancing what’s already there to match what our eyes naturally see.

Step-by-Step Editing Workflow
I remember the first time I edited a home photo – I was amazed at how a few simple adjustments transformed an ordinary image into something special. Your photos deserve that same magic touch!
Start by importing your RAW files into editing software. Adobe Lightroom is popular among professionals, but Capture One or free alternatives like GIMP work beautifully too. Think of RAW files as your digital negatives – they contain all the information your camera captured, giving you maximum flexibility.
Next, apply lens corrections to fix any distortion or vignetting. This step is especially important for wide-angle shots, which tend to bend straight lines near the edges. Then, adjust white balance to ensure consistent, natural color temperature throughout your images. Nothing says “amateur” faster than rooms that shift from warm yellow to cool blue!
When it comes to exposure, aim for balance. Brighten shadows to reveal details in darker areas while recovering highlights that might be blown out. Windows are often the trickiest part – you want to see both the interior details and the view outside.
Contrast and clarity add definition to your images without making them look artificial. As one photographer told me, “You want your photos to pop, not scream.” The same goes for color – boost vibrance slightly but avoid oversaturation that makes a home look like a cartoon.
Don’t forget to straighten and crop if needed. Crooked horizons are a dead giveaway of amateur photography. Use the spot removal tool for dust spots or minor flaws – that random light switch or outlet cover that draws the eye can often be minimized.
Finally, export for web with dimensions around 2000px on the long edge, 72dpi, as a high-quality JPEG. These settings balance quality with file size for fast loading on listing sites.
“Edit your photos,” a real estate photographer friend once told me, “but don’t go overboard. The goal is to make the space look inviting and true to life, not like a fantasy rendering.”
For consistency across your photo set, create and save presets for batch processing similar images. Many photographers swear by a “Happy Home” preset that slightly brightens images while maintaining natural colors – perfect for creating that welcoming feeling buyers respond to.
Virtual Staging & 3D Tours
Taking your marketing beyond basic photos can dramatically increase buyer engagement and help your listing stand out in a crowded market.
Virtual staging has been a game-changer for empty properties. At $15-$100 per image (versus $1,000+ for physical staging), it’s remarkably cost-effective. I’ve seen vacant, uninspiring rooms transformed into cozy, styled spaces that help buyers visualize themselves living there. The best part? You can show multiple style options for the same space, appealing to different tastes. Just remember that virtual staging requires high-quality base photos for realistic results.
3D tours create immersive walkthrough experiences that can increase listing views by up to 87%. Buyers love being able to “walk” through a property before deciding to visit in person – especially helpful for out-of-town buyers or busy professionals. While professional services start around $250, DIY options using smartphone apps like Asteroom have made this technology more accessible than ever.
For properties with special outdoor features or unique locations, aerial photography can be worth the investment. It highlights property size, surroundings, and features that ground-level photos simply can’t capture. Commercial drone operation requires FAA licensing, so either get certified or hire a professional. Weather and time of day matter tremendously – those golden hour aerial shots with long shadows can transform an ordinary property into something spectacular.
“Investing in virtual staging is what differentiates you from other sellers,” a top agent once shared with me. “It helps buyers visualize potential in empty spaces at a fraction of the cost of physical staging.”
These advanced home photography tips might seem like extra work, but they’re investments that typically pay for themselves many times over in faster sales and better offers.
More info about selecting the best real estate agent
Frequently Asked Questions about Home Photography Tips
When should I hire a professional photographer?
Let’s face it – sometimes we need to call in the pros. While these home photography tips can help anyone capture better images, there are moments when hiring a professional makes perfect sense:
- Your home is in a competitive or high-end market
- The property has unique or difficult-to-photograph features
- You lack confidence in your photography skills
- Your budget allows (typically $150-$500 depending on property size)
- Time constraints prevent you from doing it yourself
Professional photographers bring specialized equipment, experience with challenging lighting situations, and post-processing expertise that’s hard to match. It’s like the difference between a home-cooked meal and restaurant dining – both can be delicious, but the professional brings specialized tools and techniques.
“Pro results outperform DIY and can justify a few hundred dollars by boosting buyer interest,” explains one real estate expert. Think of it this way: even a 1% increase in your final sale price will likely more than cover the photography investment. For a $300,000 home, that’s $3,000 – making a $300 photography package seem quite reasonable!
What are the best times of day to shoot interiors and exteriors?
Timing truly is everything when it comes to home photography tips. The sun is your most powerful lighting tool, but it needs to be managed carefully.
For your interior shots, think about which way your rooms face:
* Morning (9-11 am) works beautifully for east-facing rooms with soft, even light
* Midday (11 am-1 pm) is perfect for north-facing rooms that receive little direct sunlight
* Afternoon (2-4 pm) flatters west-facing rooms with warm illumination
* Avoid those moments when direct sunlight creates harsh, distracting patterns on your floors and walls
When capturing your home’s exterior, timing becomes even more critical:
* Golden hour – that magical time just after sunrise or before sunset – provides warm, dimensional light that makes properties glow
* Front-facing shots should be scheduled based on orientation (east-facing homes in afternoon, west-facing in morning)
* Twilight shots taken 15-30 minutes after sunset create those dramatic “blue hour” images with warmly lit interiors
* Overcast days offer soft, even light that minimizes harsh shadows
As one photographer wisely advises, “Schedule your shoot for early morning or late afternoon. The low-angle sunlight creates warmth and dimension that flatters most properties.”
Is HDR essential for every home photo session?
HDR (High Dynamic Range) photography is like having a superpower – it combines multiple exposures to balance bright windows and darker interiors in the same frame. While not essential for every shot, it’s incredibly useful in specific situations that challenge even the best photographers:
Home photography tips for using HDR effectively include applying it when shooting:
* Rooms with bright windows alongside darker interiors
* Exterior shots with shadowy porches
* Twilight photos balancing interior and exterior light
* Any scene with extreme contrast between light and dark areas
You can achieve basic HDR results by taking 3-5 photos at different exposures (called bracketing) and combining them in software like Lightroom, Photomatix, or Aurora HDR. The key is maintaining a natural look – nobody wants to see a home that looks like a cartoon!
“HDR is unequivocally good for real estate photography,” states one expert, “but must be used carefully to avoid an artificial look.” The good news? Many smartphones now include HDR modes that produce good results automatically.
If you’re just starting out, I recommend first trying a single well-exposed image and using editing software to brighten shadows and recover highlights. Once you’re comfortable with basic editing, you can explore the more powerful world of multi-exposure HDR.
Conclusion
Let’s take a moment to reflect on what we’ve learned about home photography tips and why they matter so much in today’s real estate market. As we’ve seen throughout this guide, quality photos aren’t just a nice bonus—they’re essential tools that can help your home sell 32% faster and often at a significantly higher price point.
Think of it this way: your photos are like a handshake with potential buyers before they ever set foot in your home. Make it a good one!
The journey to great home photos isn’t complicated, but it does require attention to a few key principles:
First, preparation sets the stage for success. Taking time to declutter, arrange, and plan your shoot pays dividends in the final images. You’re not just photographing rooms—you’re helping buyers envision their future home.
Lighting truly is everything in photography. Those soft, golden rays of natural light streaming through windows create an emotional connection that artificial lighting simply can’t match. As one photographer told me, “I’d rather shoot in a modest home with beautiful light than a mansion with poor lighting.”
Your composition choices—how you frame and arrange elements within your photo—tell a story about the space. When you follow the rule of thirds, shoot from corners, and maintain straight lines, you’re creating visual harmony that draws viewers in.
While having nice equipment certainly helps, I’ve seen stunning home photos taken with smartphones by people who understood basic techniques. Your most valuable tool is knowledge, not necessarily an expensive camera.
Post-processing isn’t about creating fantasy versions of your home but rather helping your photos match what human eyes naturally see. A thoughtful edit brings balance to what the camera captured, making spaces feel true to life but at their very best.
For those looking to go the extra mile, options like virtual staging and 3D tours can dramatically increase engagement with your listing. These technologies bridge the gap between static images and in-person visits.
At YourGuideToRealEstate.net, we believe that informed homeowners make better decisions. Quality photography is one of the most accessible ways to lift your listing and attract serious buyers who connect with your home before they even walk through the door.
Whether you’re selling now or simply documenting your beloved space for memories, these home photography tips will help you capture your home as you truly see it—a place of warmth, light, and possibility.
More info about selling your home


")